Using SWAN
Working in close collaboration with our colleagues from EP-SFT (Enric Saavedra, Danilo Piparo) and IT-DB-SAS have led to the successful integration of SWAN's Jupyter notebooks with NXCALS Hadoop cluster for accessing data stored on NXCALS service and analyzing it using Spark.
- The SWAN platform is accessible at the following link: https://swan.cern.ch/
- More information about SWAN, could be found on the dedicated service homepage: https://swan.web.cern.ch/
- Example notebooks can be downloaded from CERNBox as described here
Before you start
To be able to use a NXCALS's software stack, you need to have access to the NXCALS. More details can be found here.
If you are planning to use service account instead of your personal computing account, you have to subscribe to CERNBOX service first (https://resources.web.cern.ch/resources/) and login to https://cernbox.cern.ch/ before using SWAN.
How to create a SWAN session
Note
Please note that currently, user can open maximum of two Spark connections (to the same cluster) for each SWAN session.
In other words, you can open a second notebook in the same SWAN session having a second SparkContext. Creation of third connection within the same session it will not work. This restriction could be removed if necessary at a later stage.
- Log in with your CERN NICE credentials at: https://swan.cern.ch/
-
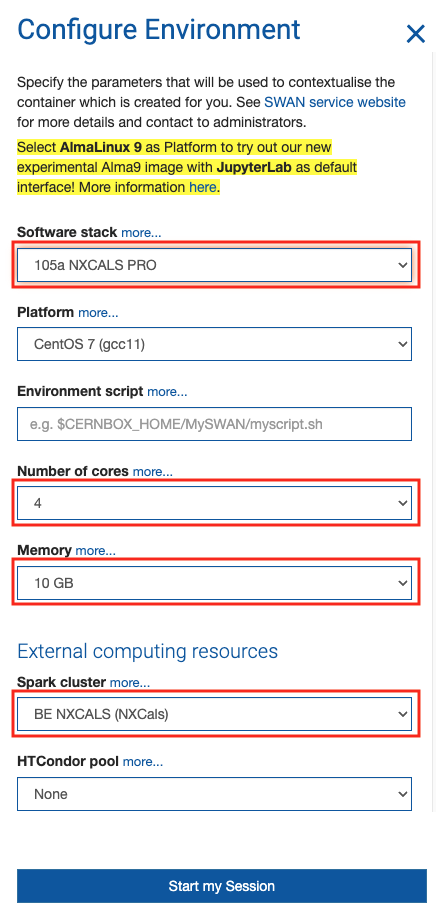
Provide the following information:
- Software stack: 105a NXCALS PRO (to ensure the latest NXCALS libraries including PyTimber)
- Platform: use proposed value proposed
- Number of cores: select required
- Memory: select required
- Spark cluster: BE NXCALS (NXCals)
-
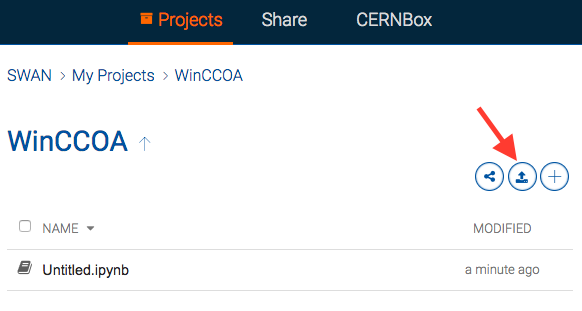
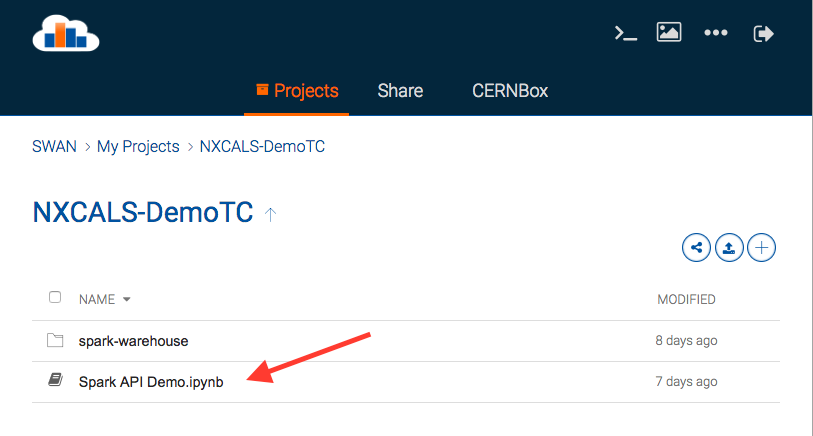
From a list of Projects select a notebook to work with or create a new one. At this point, one can notice that the platform provides a possibility to upload to / download from that directory and to share notebooks with others.
-
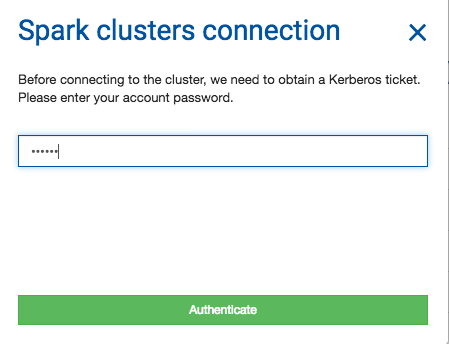
Authenticate using NICE credentials by clicking on STAR button in the navigation bar (that action will establish Spark clusters connection). Ensure that the " Include NXCALS options" check-box is enabled. With the NXCALS options in place, the "Selected configuration" region, immediately displays all the configuration that would be applied on the Spark session creation.

-
Execute content of cells
Example notebooks
There is a number of notebooks related to NXCALS project with some basic examples:
- NXCALS-Demo (from presentation given during one of BE-CO technical meetings)
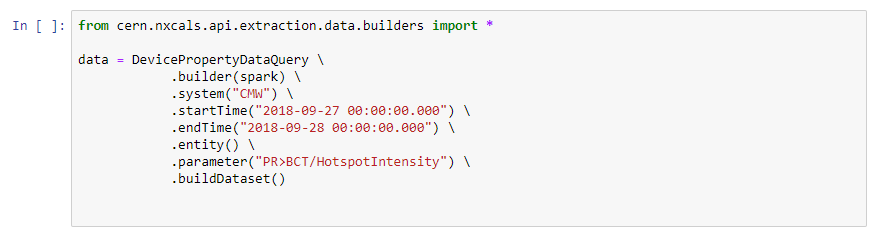
- NXCALS-Example (data retrieval using NXCALS builders, chart creation using matplotlib)
- Pandas-example (simple data manipulations using Pandas instead of Spark DataFrames)
They can be directly downloaded from CERNBox:

and then uploaded to SWAN projects: